Equipment
This is the tab where you set up all the parameters related to your equipment.
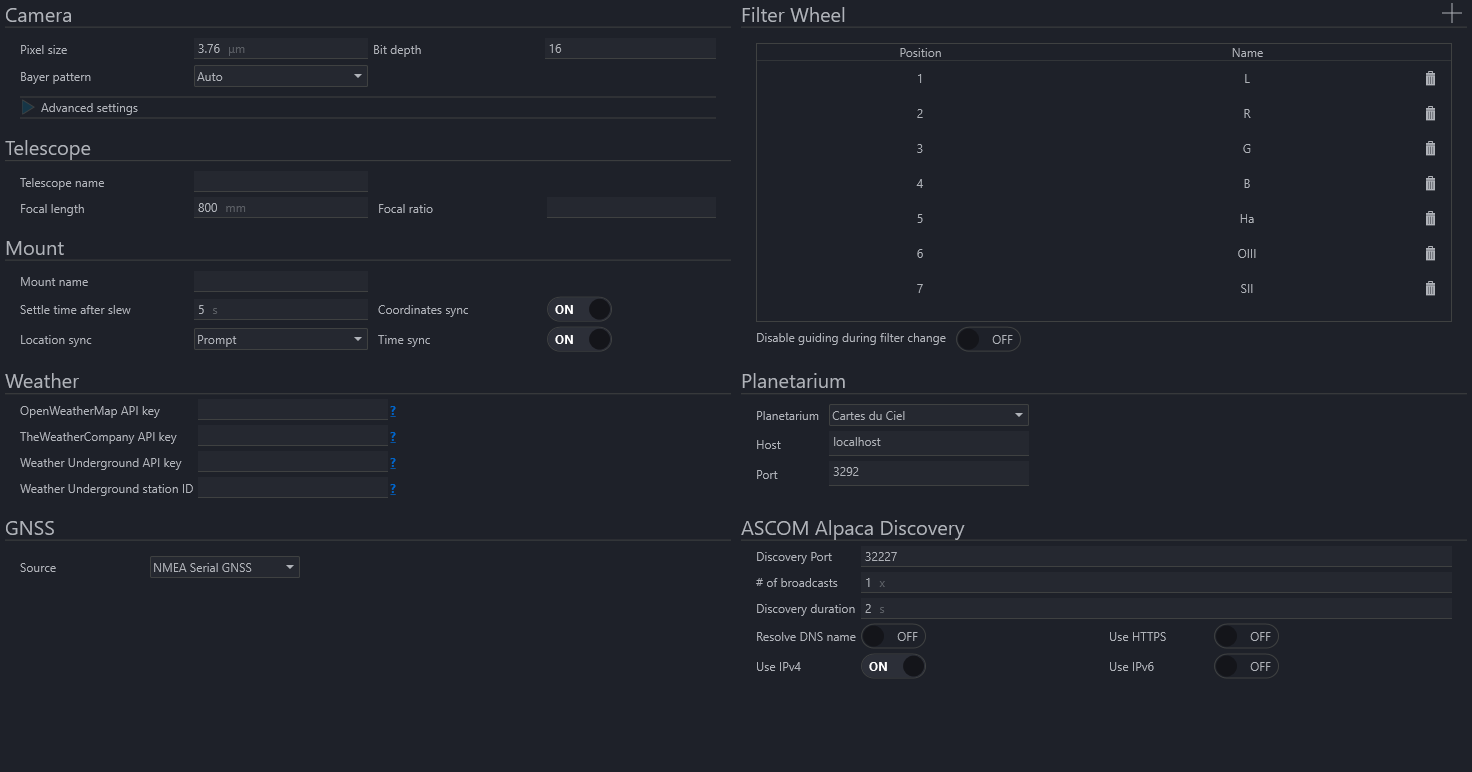
Camera#
Pixel Size#
- The Pixel Size of your camera sensor in micrometers. This field will be automatically populated by the camera, if it provides the information.
This field, together with the values in “Telescope”, is used for Plate Solving operations.
Bit Depth#
- Specify the bit-depth of the images outputted by the camera in use.
For ZWO, QHY, SBIG, FLI, PlayerOne and Atik cameras, set this to 16-bit since they are rescaled by the camera drivers.
For the native Canon or Nikon driver, set this to match the bit depth of the camera.
ToupTek, RisingCam, Altair, MallinCam, Omegon and SVBony do not scale, so set this to match the bit depth of the camera.
For other CCD/CMOS cameras, ask your camera manufacturer.
Bayer Pattern#
- Specify the bayer pattern for DSLR/OSC cameras. Leave it to Auto for auto-selection from camera drivers.
Enable bit scaling#
- Indicates if data should be shifted to 16 bits. Only relevant for ToupTek, RisingCam, Altair, MallinCam, Omegon and SVBony cameras
Bulb Mode#
- Allows you to change the bulb mode of the camera. Native will work in most cases.
RS232 and Mount is available as well and might be necessary for older Nikon cameras For usage of RS232 and Mount shutter refer to Usage: Using RS232 or Mount for bulb shutter
Camera Timeout#
- Specifies how long N.I.N.A. should wait after the exposure time for the frame download before timing out and proceeding.
ASCOM allow odd pixel dimensions#
- In previous versions of N.I.N.A. the pixel dimensions were always truncated to have even width and height due to OSC cameras. This switch allows to utilize the full sensor size for mono cameras when using the ASCOM driver.
Telescope#
Telescope#
- This section lets you enter the parameters of your telescope that will be used for Plate Solving.
If you change telescope, remember to update these settings or to switch profile under Options/General.
Settle time after slew#
- Time in seconds to wait after a scope slew before imaging again
No Sync#
- When active it prevents sending syncs to the mount during centering. Instead an offset is calculated to center the mount.
Can be useful when you have a permanent setup and a good mount and created a solid pointing model in order not to interfere with it.
Weather#
API Keys#
- Input your personal API key for the various weather sources.
Click on the question mark to open the respective page for the API key
Filter wheel#
Filter wheel#
- If a Filter Wheel is connected in Equipment this window lists the available filters and names.
- Position: filter position
- Name: name of the filter as imported from ASCOM driver
- Focus Offset: offset values that are used at each filter change if "Use FilterWheel Offsets" is enabled.
- Auto Focus Exposure Time: it is possible to specify an AF exposure time for each filter
Filter + - Buttons#
* These buttons add and remove filters from the filter wheel list (24)
Filter Wheel Configuration#
The Filters defined in the Filter Wheel list are used in various places in N.I.N.A., especially in:
- The Sequencer: certain places can specify a filter for capture
- The Plate Solving routine: it can be set to use a particular filter, to have lower exposure times for plate solving (e.g. using L rather than HA)
- The Auto-Focus routine: like plate solving, autofocus can be set to use a particular filter, as well as having filter-specific autofocus options
For the above to work well, it is necessary to define the proper filters available.
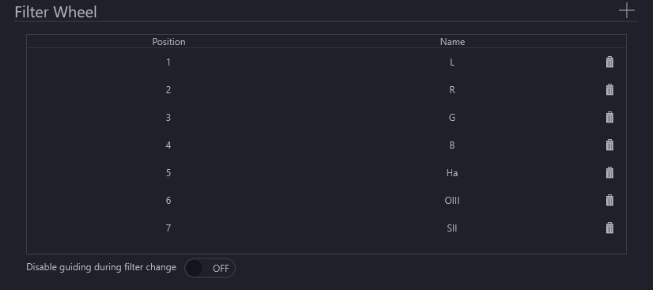
The screen looks like the below:
Adding filters
Typically the first step for a user when first setting up the filter wheel is to connect to a filter wheel. This will take the information about the filters from the filter wheel itself, and automatically populate the list in N.I.N.A. based on that information.
If this doesn't work, it is possible for the user to use the + and - buttons to manually add or remove filters. Note that the Position order of the filters in this tab should match the order of the physical filters in the filter wheel.
For example, if a filter wheel has the following filters:
- Luminance filter at position 1
- Red filter at position 2
- Green filter at position 3
- Blue filter at position 4
- H-Alpha filter at position 5
then the screen should be configured as per the screenshot above, starting with the L filter, and going in order until the HA filter.
Planetarium Settings#
The Planetarium section contains settings for each of the 4 supported planetarium programs. Currently N.I.N.A. supports Stellarium, Cartes du Ciel, TheSkyX and HNSKY. The connection allows a one way communication of coordinates from the planetarium software to N.I.N.A.
If a planetarium program is configured, coordinates can be imported anywhere in the program that has the Planetarium Sync Button.
Preferred Planetarium Software#
- This drop-down menu selects the planetarium software to be used
Host#
- This is the address the planetarium server is hosted on
The default 'localhost' will work if you're running the planetarium software on the same machine
Port#
- Each software's server operates on a different port
It is recommended to leave this at default